この記事では、SwiftUIでのRevenueCat 利用するApp内課金(AppPurchases)実装方法を紹介します。
実装の例として、非消耗型、新規のApp内課金、すでに購入済みの場合の確認動作のコードを作成します。
なお、Apple Developerのアカウント作成、契約/税金/口座情報の登録が済んでいる状態から解説を行っています。
◆動作検証環境
・XCode:12.3
・SwiftUI:2.0
・iOS:14.0
・Life Cycle:SwiftUI App
AppStoreConnectへアプリの登録
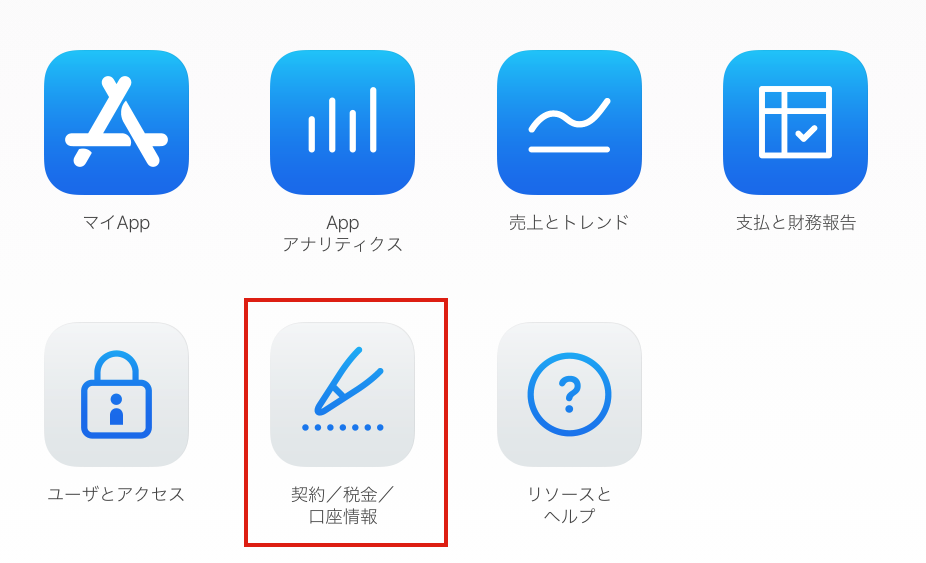
契約/税金/口座情報の登録状況の確認
AppStoreConnect内でのApp内課金情報を登録するには、契約/税金/口座情報の登録を済ませておく必要があります。
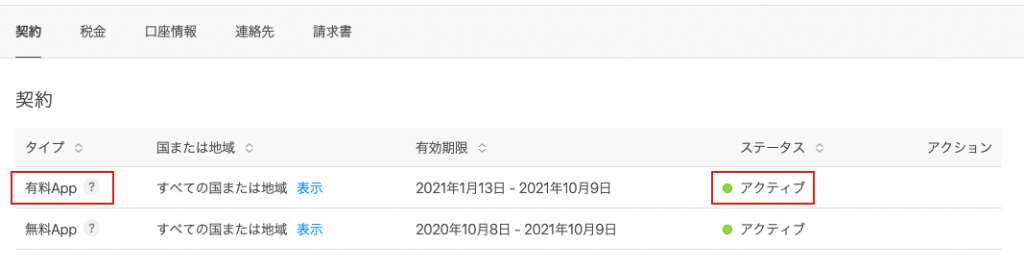
契約/税金/口座情報から状況を確認します。
有料Appのステータスが [アクティブ]になっている事を確認します。
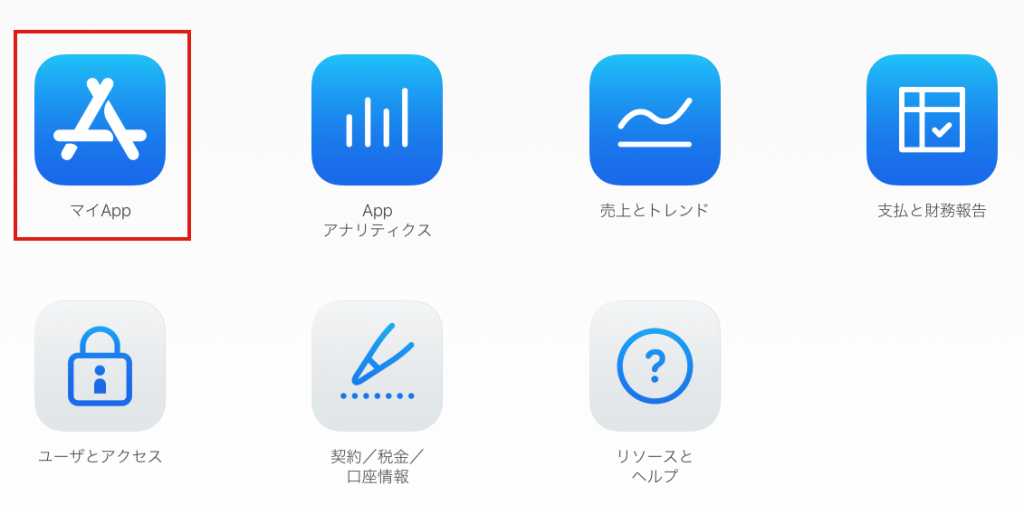
アプリの新規登録
マイAppからアプリの新規登録を行います。
AppStoreConnect内でのApp内課金情報の登録
AppStoreConnectにアプリを登録できたら、App内課金情報の登録を行います。
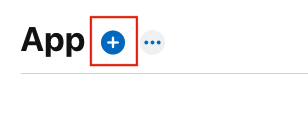
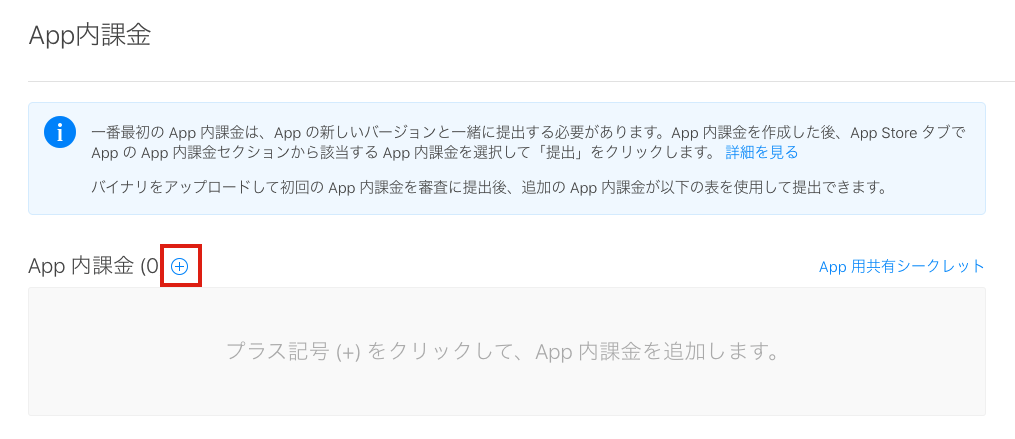
App内課金の[管理]を選択
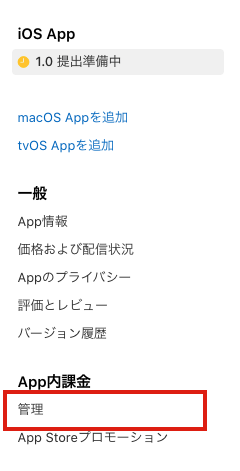
プラスマークを選択
App内課金のタイプを選択
今回は非消耗型を選択します。
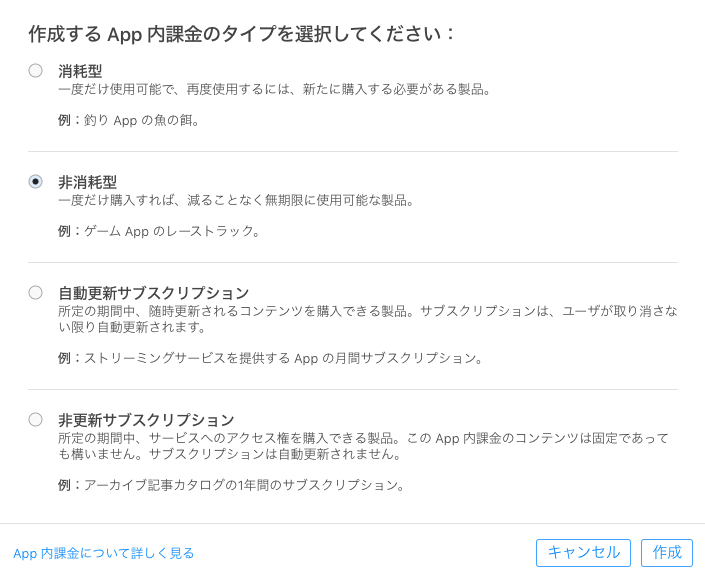
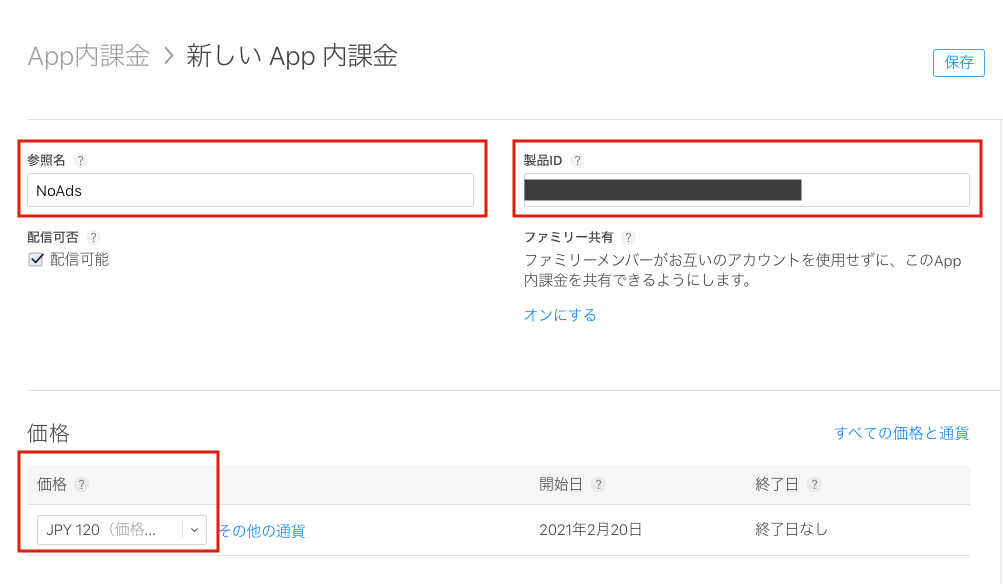
続いて、選択したタイプのApp内課金の詳細情報を登録します。
まずは、参照名、製品ID(記入例:com.sample.MyApp.NoAds)、価格を設定します。
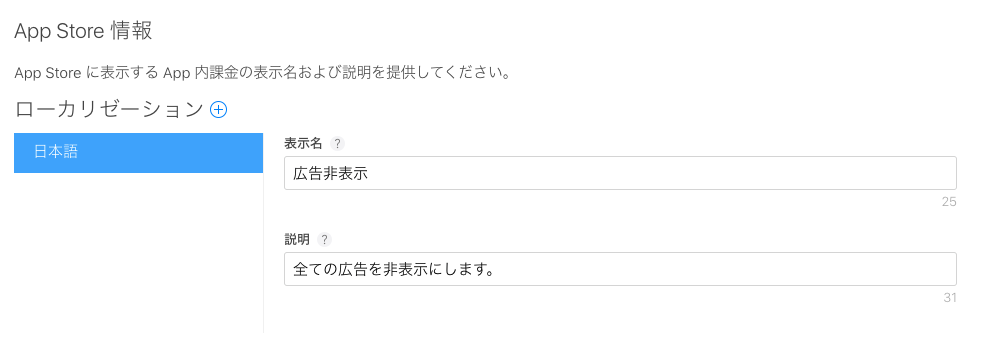
次に、App内課金の表示名および説明を記入します。
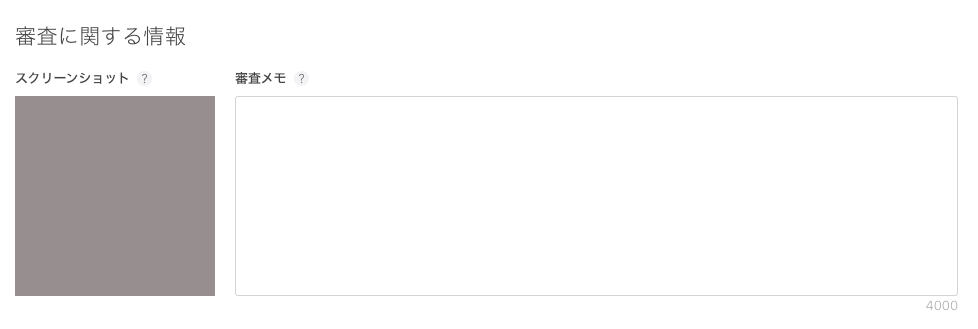
最後にスクリーンショットを追加します。
ここでは仮のイメージを選択していますが、申請前はApp内課金の購入確認画面等を設定します。
イメージの条件は下記のとおりです。
- iOS では、少なくとも 640 x 920 ピクセルが必要
- tvOS では、1920 x 1080 ピクセルが必要
- macOS では、1280 x 800 ピクセルが必要
必要な入力が終わりましたら、保存して登録は完了です。
ステータスが「送信準備完了」となっている事を確認します。

RevenueCat内でのApp内課金情報の登録とインストール
RevenueCat内でのApp内課金情報の登録
RevenueCatでの設定に進みます。
まずは、RevenueCatのアカウント作成です。
こちらのサイトから行います。今回は無料のプランを利用します。
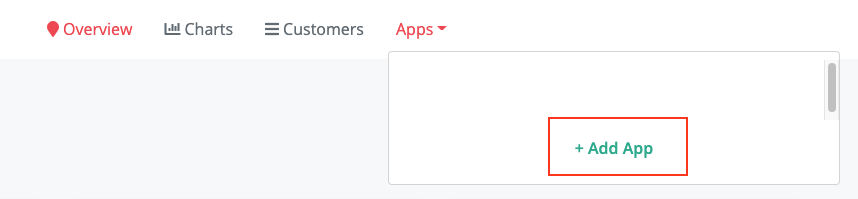
アカウント作成、ログインが済んだら、[Apps]メニューより新規のAppを登録します。
続いてApp情報を入力します。
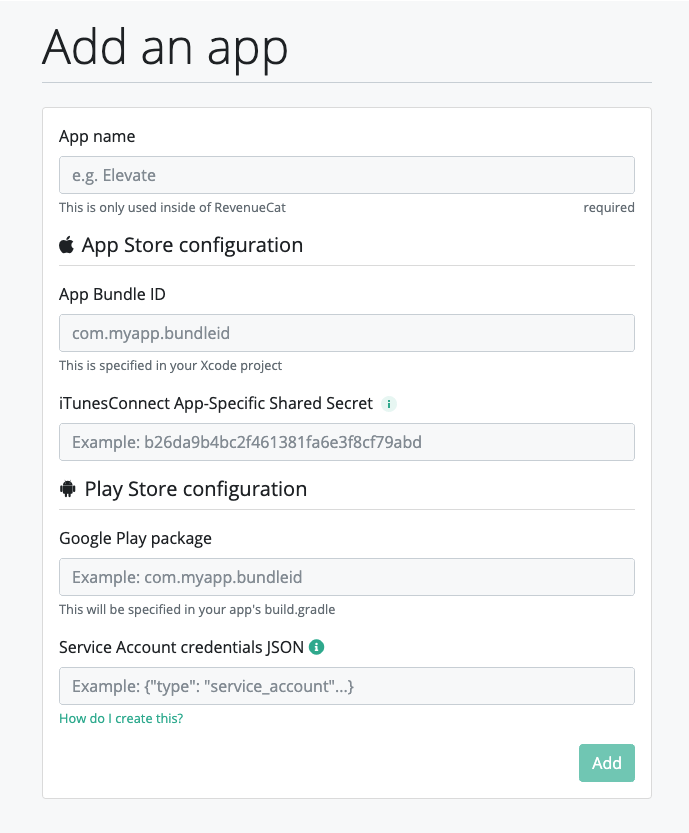
今回はiOSのアプリなので入力が必要な箇所は、
- App name
- App Bundle ID
- iTunesConnect App-Specific Shared Secret
の3箇所となり、以下の情報を登録します。
App name
任意のApp名
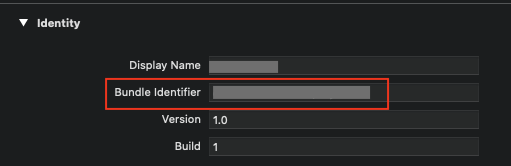
App Bundle ID
アプリのBundle ID
XCodeのTargets設定で確認します
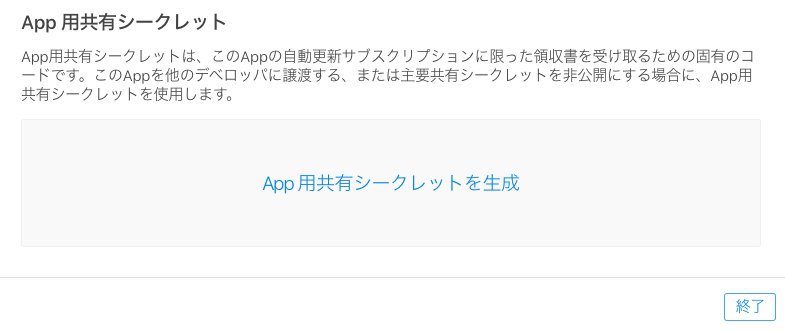
iTunesConnect App-Specific Shared Secret
App Store Connect内で対象のアプリを選択→App内課金→管理→App用共通シークレットを選択します。

App用共通シークレットを生成を選択し、表示されるコードを入力します。
これで新規Appが登録されます。
次に、登録したApp内に[Products]情報を設定します。
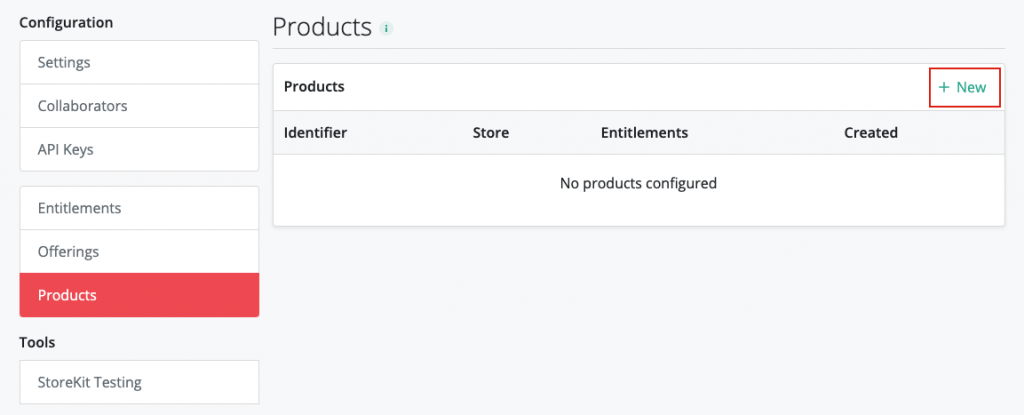
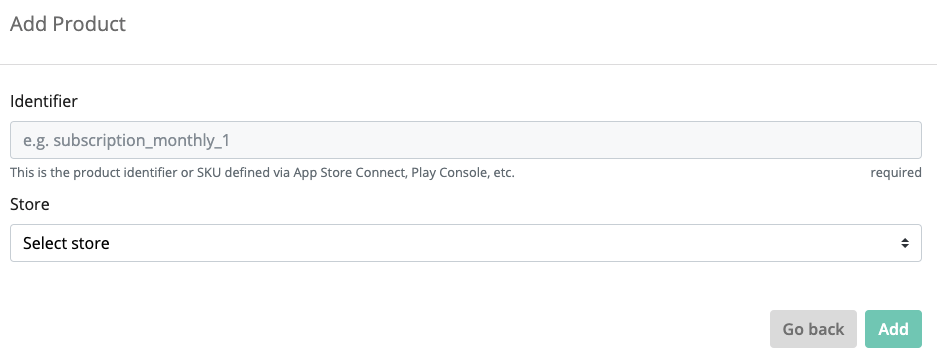
Identifierには、App Store Connect内で対象のアプリを選択→App内課金→管理で表示されている[製品ID]を入力します。

Storeは[App Store]を選択します。
これでRevenueCat内の設定が完了します。
RevenueCatのインストール
次に、RevenueCatのインストールを行います。
今回はCocoaPodsを利用する方法で行います(CocoaPodsがインストールされている状態で説明します)。
XcodeプロジェクトへCocoaPodsを導入する
導入の作業の前に、Xcodeのプロジェクトが開かれているか確認します。開いている場合はプロジェクトを閉じます。
プロジェクトディレクトリへの移動
1 2 3 | cd xcode_project |
CocoaPodsファイルの作成
1 2 3 | pod init |
Podfileの編集(RevenueCatの導入)
さきほどのpod init を行ったディレクトリにPodfile が作成されるので、内容を下記のように編集します。
1 2 3 4 5 6 7 8 9 10 11 12 13 | # Uncomment the next line to define a global platform for your project # platform :ios, '9.0' target 'YourApp' do # Comment the next line if you don't want to use dynamic frameworks use_frameworks! # Pods for YourApp pod 'Purchases' #追加 end |
編集後に下記コマンドでPurchases のインストールを行います。
1 2 3 | pod install |
インストール後の更新作業は下記コマンドで行います。
1 2 3 | pod update |
対象のモジュールのインストール後からは、ProjectName.xcworkspace で作業、編集を行います(ProjectName.xcodeproj ではない。)
App内課金購入と、購入ステータス確認のコード実装
まずはイニシャルファイル(Applicationファイル)の編集を行います。下記のように編集します。
MyAppNamaApp.swift
1 2 3 4 5 6 7 8 9 10 11 12 13 14 15 16 17 18 19 | import SwiftUI import Purchases @main struct SprayTimerApp: App { init(){ Purchases.debugLogsEnabled = true Purchases.configure(withAPIKey: "xxxxxxxxxxxxxxxxxxxxx") } var body: some Scene { WindowGroup { ContentView() } } } |
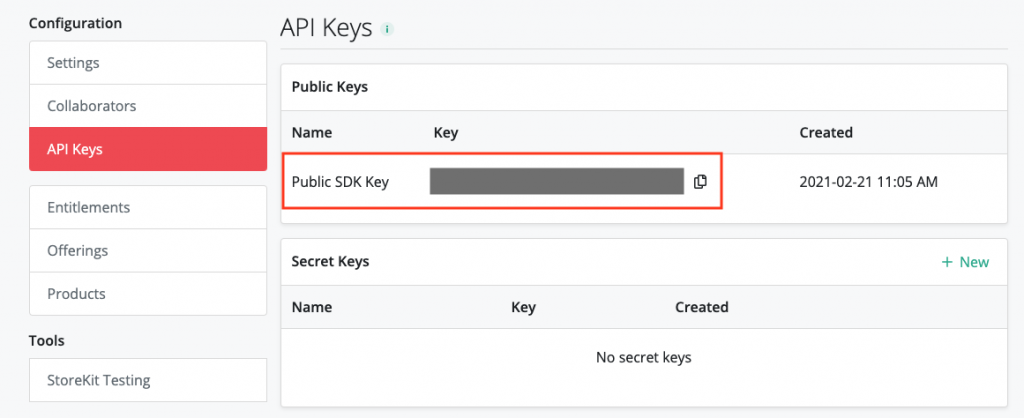
withAPIKeyはrevenueCatサイトの登録しているApp情報から確認します。
次に、PurchaseServiceクラスと、ViewModelクラスを作成します。
PurchaseService.swift
1 2 3 4 5 6 7 8 9 10 11 12 13 14 15 | import SwiftUI import Purchases import Foundation class PurchaseService{ static func purchase(productId:String?, successfulPurchase:@escaping() -> Void){ guard productId != nil else { return } } } |
ViewModel.swift
1 2 3 4 5 6 7 8 9 10 11 12 13 14 15 16 17 18 19 20 21 22 23 24 25 26 27 28 29 30 31 32 33 34 35 36 37 38 39 40 41 42 43 | import SwiftUI import Purchases class ViewModel: ObservableObject { @Published var productId:String = "xxxxxxxxxxxxxxxxxxxx" @Published var userPurchases = [String:Bool]() func makePurchase(){ ViewModel.purchase(productId: productId){ self.userPurchases[self.productId] = true self.isShowProgress = false } cancelPurchase:{self.isShowProgress = false} } static func purchase(productId:String, successfulPurchase:@escaping() -> Void, cancelPurchase:@escaping() -> Void){ Purchases.shared.products([productId]) { (products) in if !products.isEmpty { let skProduct = products[0] Purchases.shared.purchaseProduct(skProduct) { (transaction, purchaserInfo, error, userCancelled) in if error == nil && !userCancelled { // successful purchase successfulPurchase() } if userCancelled{ cancelPurchase() } } } } } } |
productIdは、AppStoreConnectの情報を参照します。

あとは、ContentViewなどで、作成した購入メソッドを実行します。
ContentView.swift
1 2 3 4 5 6 7 8 9 10 11 12 13 14 15 16 17 18 19 20 | import SwiftUI import CoreData struct ContentView: View { @StateObject var viewModel = ViewModel() var body: some View { VStack{ Button(action: { viewModel.makePurchase() }, label: { Text("Buy") }) .padding() } } } |
シミュレーターで動作の確認のために、Buyボタンを押すとコンソールに以下のようなエラーが出ます。
ERROR: 🍎‼️ SKRequest failed: UNKNOWN_ERROR
App内課金の動作確認は、実機でのテストが必要となります。
App内課金購入と、購入ステータスの実機動作確認
実機に接続してビルドして、Buyボタンを押すと以下のような表示になります。
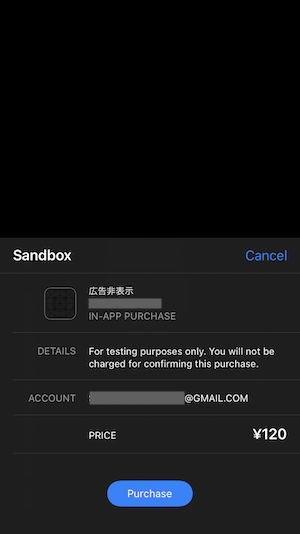
これでApp内課金の実装が完了です。
すでに購入済みの場合の確認動作のコードとその他仕上げ
これまでの作業で購入時の実装は完了しました。
現在のアップルの規定だと、App内購入の機能を持つAppはすでに購入済みの場合、新規で購入する事を防ぐ機能をもたせる必要がありますので、すでに購入済みか確認し、すでに購入している場合は購入時と同じ動作になるようコードを追加編集します。
同時に、現在Buyボタンを押してから、購入ページが表示されるまで動作が行われている事をユーザーに知らせるために、App内課金の動作が行われている間はプログレスの表示を行うようにします。
ViewModel.swift
1 2 3 4 5 6 7 8 9 10 11 12 13 14 15 16 17 18 19 20 21 22 23 24 25 26 27 28 29 30 31 32 33 34 35 36 37 38 39 40 41 42 43 44 45 46 47 48 49 50 51 52 53 54 55 56 57 58 59 60 61 62 63 64 65 66 67 68 69 70 71 72 73 74 75 76 77 78 79 80 81 82 83 | import SwiftUI import Purchases class ViewModel: ObservableObject { @Published var isShowProgress = false @Published var productId:String = "xxxxxxxxxxxxxxxxxxxxxxx" @Published var userPurchases = [String:Bool]() func makePurchase(){ ViewModel.purchase(productId: productId){ self.userPurchases[self.productId] = true self.isShowProgress = false } cancelPurchase:{self.isShowProgress = false} } func makeRestore(){ ViewModel.restore(productId: productId){ self.userPurchases[self.productId] = true self.isShowProgress = false } cancelRestore: {self.isShowProgress = false} } func offShowProgress(){ self.isShowProgress = false } static func purchase(productId:String, successfulPurchase:@escaping() -> Void, cancelPurchase:@escaping() -> Void){ Purchases.shared.products([productId]) { (products) in if !products.isEmpty { let skProduct = products[0] Purchases.shared.purchaseProduct(skProduct) { (transaction, purchaserInfo, error, userCancelled) in if error == nil && !userCancelled { // successful purchase successfulPurchase() } if userCancelled{ cancelPurchase() } } } } } static func restore(productId:String, successfulrestore:@escaping() -> Void, cancelRestore:@escaping() -> Void){ Purchases.shared.products([productId]) { (products) in if !products.isEmpty { Purchases.shared.restoreTransactions { (purchaserInfo, _) in print("purchaserInfo ↓") if purchaserInfo!.entitlements.all["noAds"]?.isActive == true{ successfulrestore() print("Active") }else{ cancelRestore() print("InActive") } } } } } } |
PurchaseService.swift
1 2 3 4 5 6 7 8 9 10 11 12 13 14 15 16 17 18 19 20 21 22 | import SwiftUI import Purchases import Foundation class PurchaseService{ static func purchase(productId:String?, successfulPurchase:@escaping() -> Void){ guard productId != nil else { return } } static func restore(productId:String?, successfulPurchase:@escaping() -> Void){ guard productId != nil else { return } } } |
ContentView.swift
1 2 3 4 5 6 7 8 9 10 11 12 13 14 15 16 17 18 19 20 21 22 23 24 25 26 27 28 29 30 31 32 33 34 35 36 37 38 39 | import SwiftUI import CoreData struct ContentView: View { @StateObject var viewModel = ViewModel() var body: some View { VStack{ Spacer() if viewModel.isShowProgress{ ProgressView() } Spacer() if viewModel.userPurchases[viewModel.productId] ?? false{ Text("Purchased") .padding() } Button(action: { viewModel.isShowProgress = true viewModel.makePurchase() }, label: { Text("Buy") }) .padding() Button(action: { viewModel.isShowProgress = true viewModel.makeRestore() }, label: { Text("Restore") }) .padding() Spacer() } } } |
これで、App内課金のアクセスが行われている間はプログレスが表示されます。
購入が行われるとviewModel.userPurchases[viewModel.productId] がtrueとなり、Text("Purchased") が表示されるようになります。
Restoreボタンが押されると、すでに確認済みかを確かめ、未購入であればプログレスの表示が消えるようになりました。
お疲れ様でした。
以上、SwiftUIでのRevenueCat 利用するApp内課金(AppPurchases)実装方法を紹介しました
(実装の例として、非消耗型、新規のApp内課金、すでに購入済みの場合の確認動作のコードを作成)